Lab 4: Characterize your Car
Objective: Get familiar with and document the capabilities of the hardware.
Prelab:
Before starting measurements, I checked that the Artemis works while being powered by a 650mAh battery. To do this, I first took the 2mm white JST connector and reversed the positions of the red and black wires so that they would match up with the + and - ports on the board, respectively. Next, I soldered the JST connector to the battery connector wires. Since the wires are also reversed on the battery connecter, I put labels on the battery connector wires to mark that the black wire actually connects to the red wires on the JST connector and the battery, and the red wire connects to the black wires on the JST connector and the battery. The setup can be seen below:
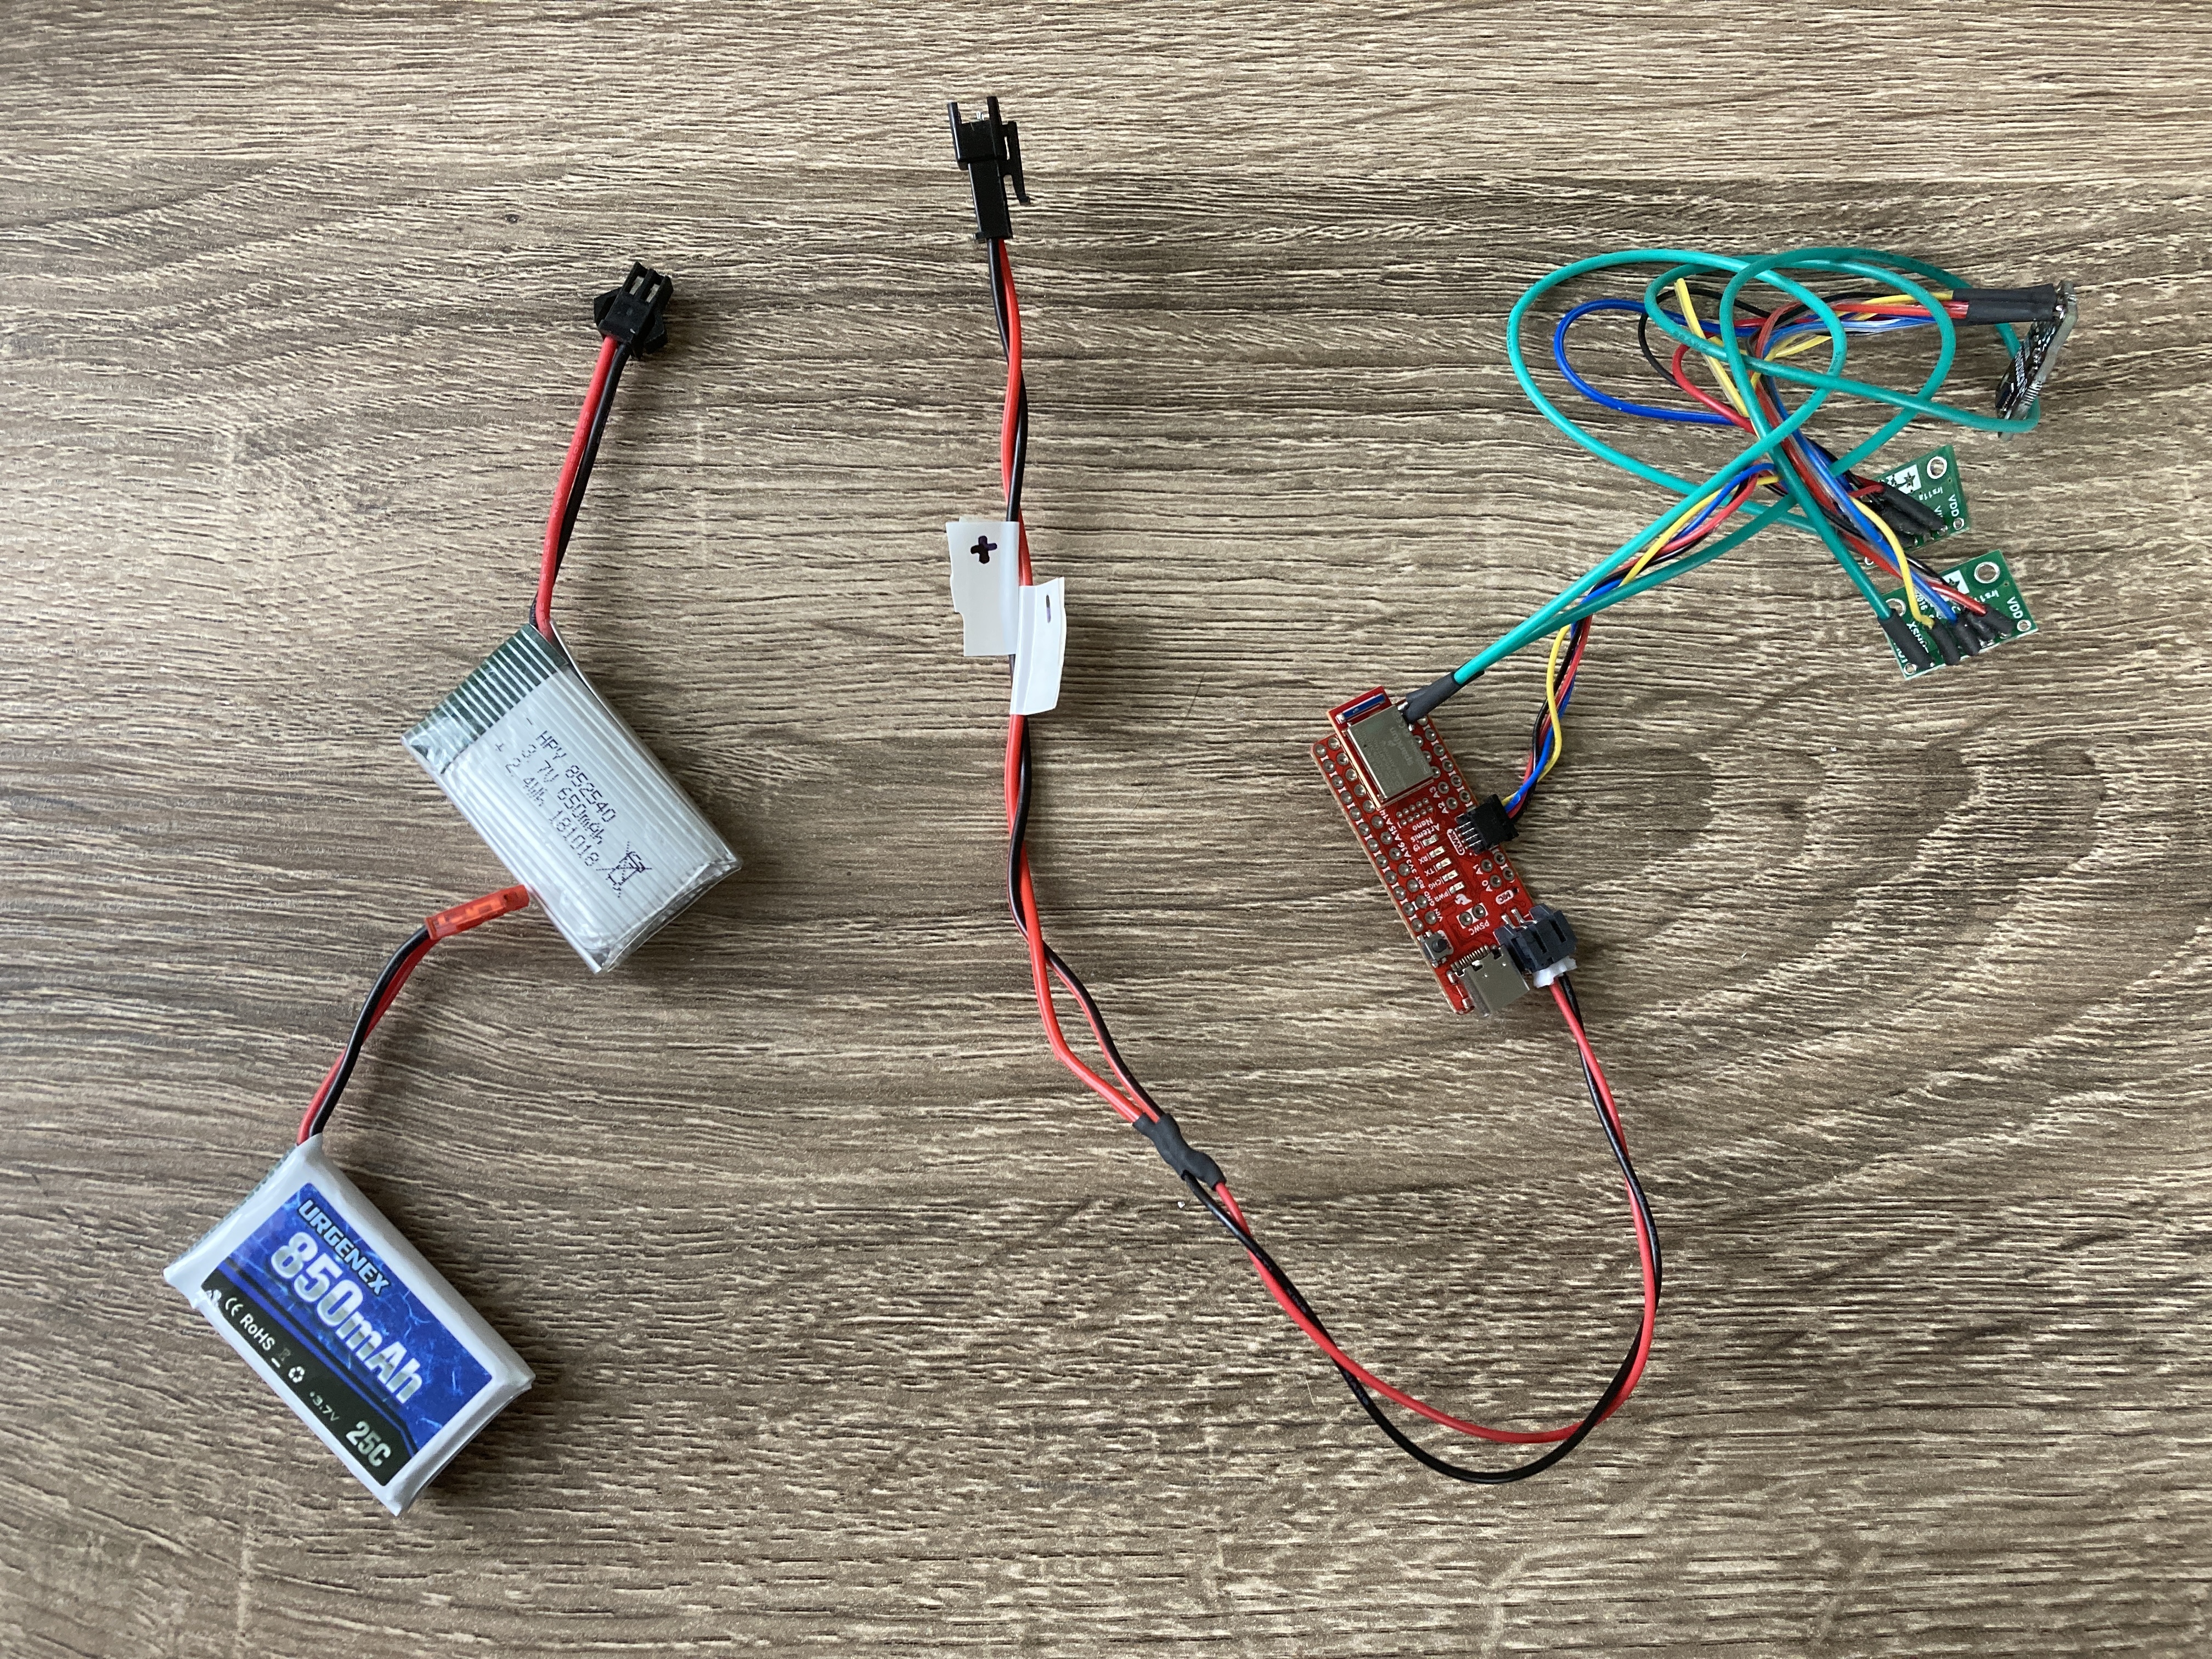
After carefully verifying that all the wires were set up correctly (despite the confusing colors), I plugged in the battery while the Artemis was connected via USB to my computer, and the yellow LED lit up. This meant that the battery was being charged from the USB port, and everything was working properly.
Testing!
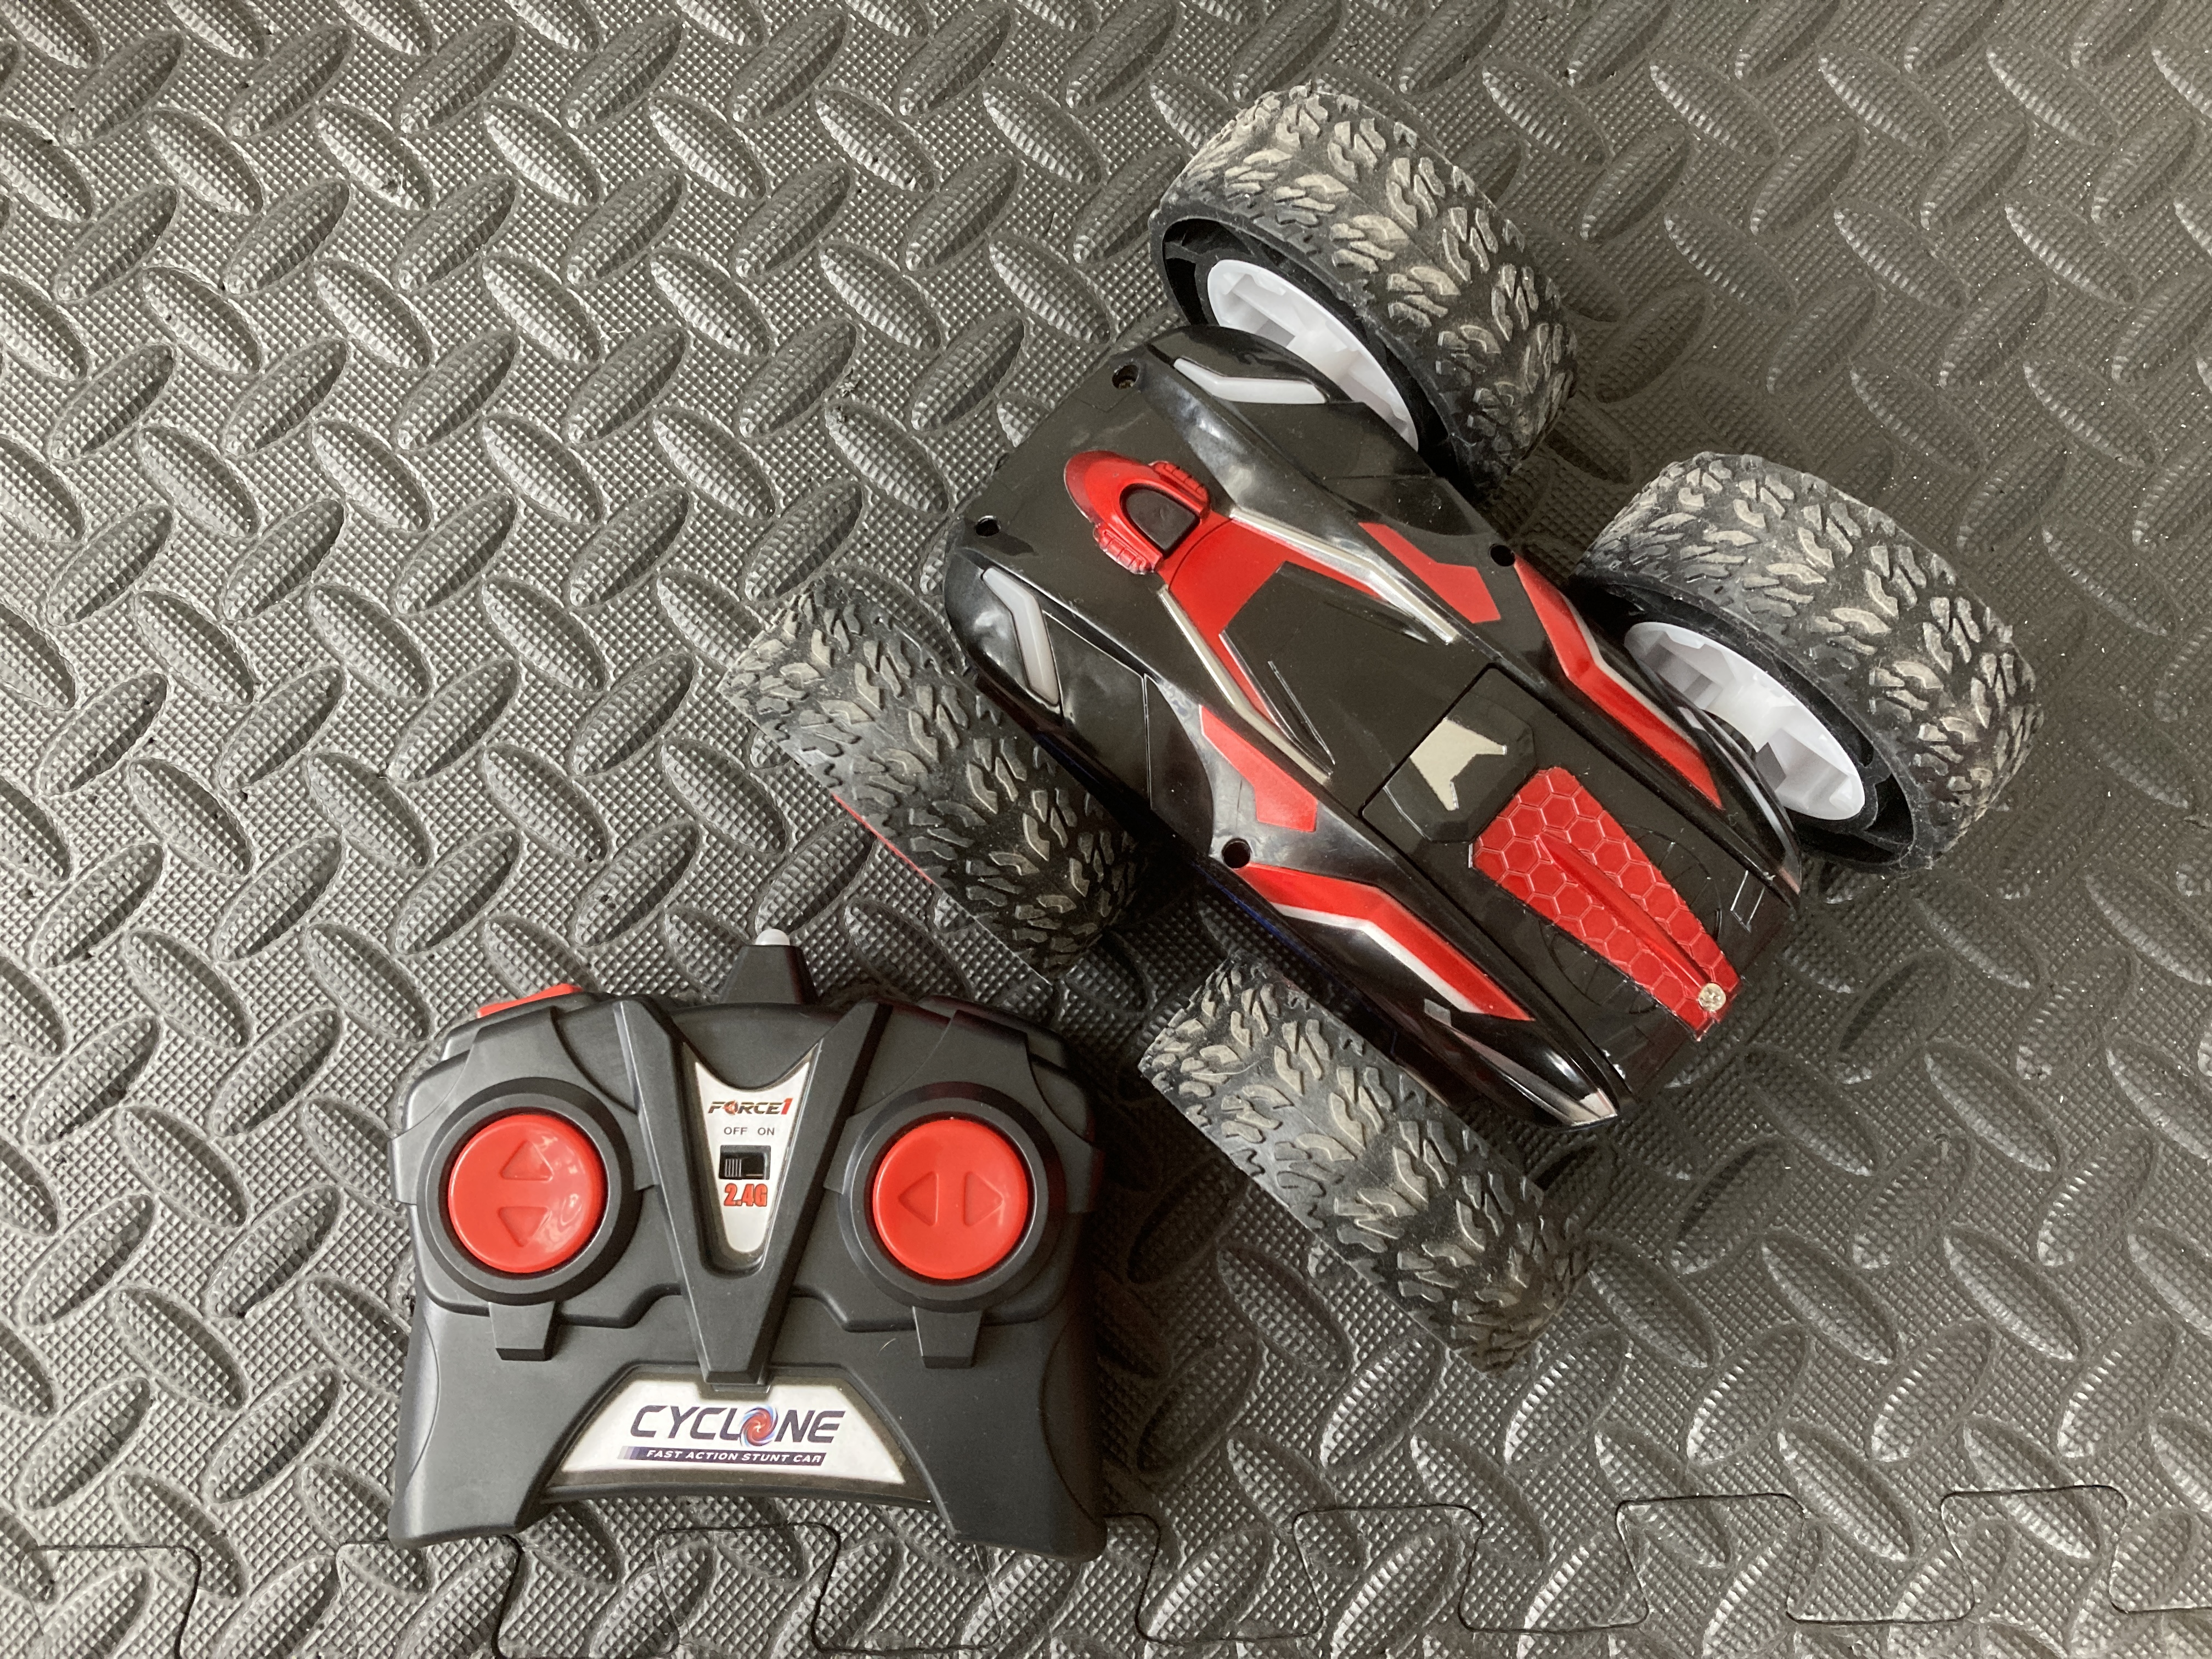
Next, we can move on to testing the capabilities of the RC car. For this lab, I collaborated with Syd Lawrence.
The car is powered by an 850mAh battery, and it is controlled using a remote control.
Dimensions and Weight
Knowing the dimensions of the car can help us determine where the car can fit. The car is quite short and wide, so it could fit under things very well (like a Roomba).
| Dimension | Measurement |
|---|---|
| Length (including wheels) | 18 cm |
| Width (including wheels) | 14.2 cm |
| Height (including wheels) | 8 cm |
| Length (chassis) | 14.2 cm |
| Width (chassis) | 7.3 cm |
| Height (chassis) | 5 cm |
In addition, the weight of the car with just the battery is 518 grams, and this increases to 553 grams when the Artemis, sensors, wire, and 650 mAh batteries are added (these values were measured by Syd). Given that the car is pretty short and wide, the center of mass is low to the ground, and it is difficult for the car to flip over on its side. Since the motors are quite powerful, the car can still do front flips and back flips with ease.
Batteries
Measuring the battery life and time to full charge provides valuable information on how long we can drive the car and how long we have to wait for it to get to full charge again.
| Trial | Time |
|---|---|
| Battery Life | 8:11 (when only turning in circles) |
| Time to full charge | a really long time (overnight) |
Drifting Distance
I wanted to measure the distance that it takes for the car to drift to a stop after releasing the driving buttons. Understanding how far the car moves after releasing all controls is helpful for improving the accuracy of the car’s movements. For example, if the car is driving forward autonomously and we want it to suddenly stop after 5 meters, we would need to tell it to stop before 5 meters so that it can drift the rest of the way and not overshoot the distance.
To do this, I set up a tape measure in the hallway in Phillips Hall, drove the car forward at maximum speed (this required about 5 feet of a head start), and measured the distance between when I released the buttons and when the car came to a full stop. I took five measurements in a row and noticed that the drifting distance decreased over time. This is probably due to the short battery life, and after many trials, the maximum speed of the car was much lower than its maximum speed at full charge.
| Trial | Distance |
|---|---|
| 1 | 371 cm |
| 2 | 389 cm |
| 3 | 338 cm |
| 4 | 300 cm |
| 5 | 238 cm |
Braking Distance
Similar to the drifting distance, I wanted to measure how fast the car can to come to a stop while braking. This information can help us improve the accuracy of the car’s movements, especially sudden stops.
I set up the experiment in the same way as before, however instead of releasing all buttons and letting the car drift to a stop, I would immediately press the back button to see how fast it could reverse its direction. After ramping the car up to full speed, I measured the distance between when I started reversing direction on the remote control and when the car actually reversed direction. I considered the moment the car fully reversed direction as the stopping point, since the car’s velocity momentarily reaches zero. The measured distances decreased over time, most likely due to the short battery life and lowered maximum speed after many trials.
| Trial | Distance |
|---|---|
| 1 | 104 cm |
| 2 | 90 cm |
| 3 | 90 cm |
| 4 | 75 cm |
| 5 | 70 cm |
Surfaces
After experimenting on the tiled floors of Phillips Hall, I determined that the car can drive very well on smooth, flat surfaces. Next, I brought the car home and tested it on bumpier surfaces including my carpet and exercise mats.
I found that driving on relatively flat and smooth surfaces led to longer drifting distances. In comparison, the drifting distance was much shorter while driving on carpet, and it also seems like the car does a small jump whenever it starts driving.
How reliably can we control the car with manual control?
Not well.
Minimum movements
I wanted to see the minimum amount of distance the car would move for each press of the button, and this can help me determine how accurately the car can move to a set point. In the video below, each movement that the car makes is a result of me pressing and releasing a button on the remote control as fast as possible.
From the results of this experiment, we can see that the car isn’t very accurate with moving small distances. Each forward/backward motion moves it along about 1 foot, and each turning motion results in an angle change of about 45 degrees.
Turning around its own axis
The car can spin in circles quite quickly (about 3-4 revolutions per second), however, it does not spin in the same spot and starts to drift away. The following video was recording at 240 fps, which is 0.25x regular speed.
While it’s great that the car is so speedy, being able to turn this fast also has its cons. As seen above, it is difficult to get the car to turn at angles smaller than 45 degrees. When the car is moving forward and backward at full speed, precise turning becomes even harder. If the left/right button is held for a split-second too long, the car starts spinning out of control. In the video below, I tapped the right turn button while holding down the forward drive button, and the car managed to make a nice right turn into the wall.
Driving in a Square
Next, I tried to drive the car in a 1x1 meter square. This proved to be very challenging, since the car kept overshooting the forward/backward movements and turning angles. Even when I tapped the buttons on the remote control as quickly as possible, the car would launch itself way past the position I intended for it to go. In the end, I was somewhat able to make it go in a square, though it was not a very precise square.
Stunts
Since the car is relatively flat and its center of mass is low to the ground, it is difficult to drive the car on less than 4 wheels at a time. However, it can kind of do a wheelie for half a second. To pull off this “stunt,” I first drove the car forward at full speed, then held down the backward button for about 0.5-1 second. I found that if you don’t hold down the back button for long enough, the car cannot get the front wheels off the ground, and if you hold down the button for too long, the car will start doing uncontrolled back flips.
On the remote control, there is a button on the top that does not control forward/backward and left/right, and I assume it’s a “stunt” button. Pressing this button will cause the car to drive erratically for 5-10 seconds, which was interesting but also terrifying whenever I pressed the button on accident.
Sometimes, the seemingly random movements ended up looking like stunts.